Have you ever found a bug in your app and wondered how it got there in the first place? If you can test for the bug—either manually or with a test suite—you can find the exact commit where it started with git bisect. By reducing the surface area to a single commit, it’s much easier to find the root cause of a bug.
How Does Git Bisect Work?
git bisect can find the exact commit that introduced a bug by using the binary search algorithm. Binary search is an algorithm that finds things in a sorted list—and that’s exactly what your git commit history is. You start by giving git bisect a “good” and “bad” commit as starting points. Then, git bisect takes you through certain commits between those and lets you test each one. Test enough commits this way and it finds the guilty one.
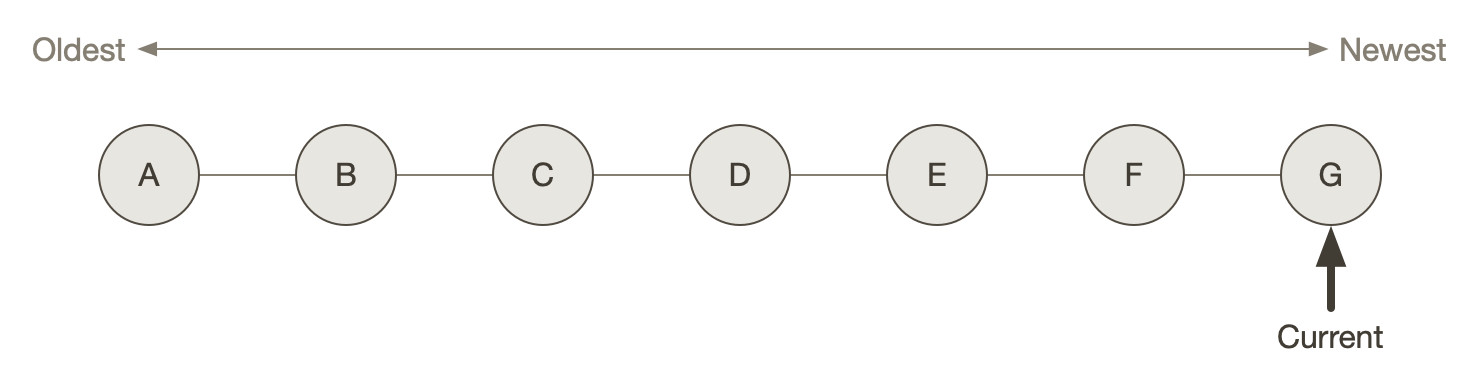
Imagine you have the following commits, from oldest A to newest G:
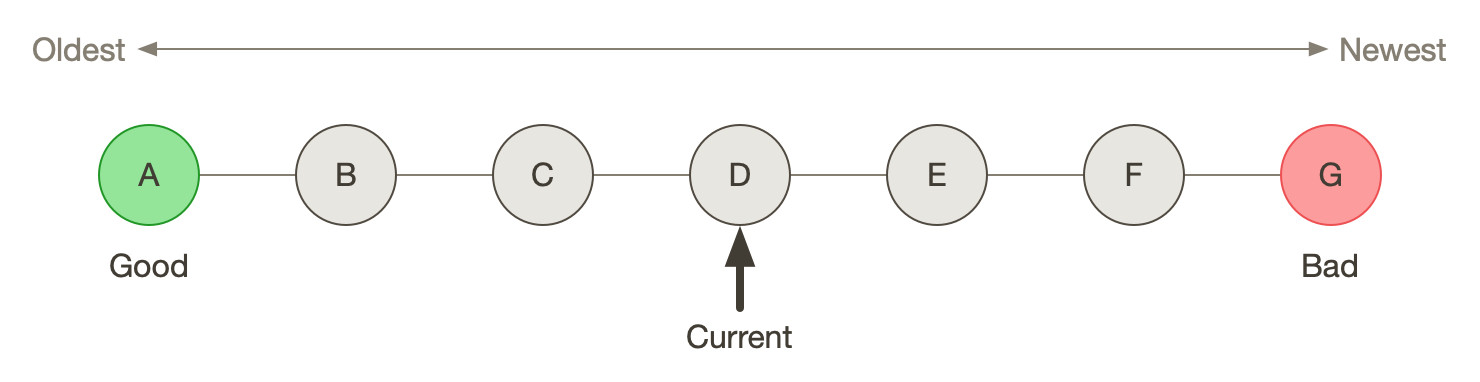
Let’s say you found a bug on commit G, the most recent commit, and you can repeat it by starting the app and manually testing it. You can also check out commit A, an older commit, and verify the bug doesn’t exist there. These are your good and bad starting points.

Start git bisect by giving it the bad and good commits, in that order:
1
git bisect start G A
Now you will be taken to the middle of those two commits, commit D. You have to test for the bug on this commit, so you start your app and manually test it. Here is our current state of commits:
Let’s assume the bug is present here, so it’s considered bad. Tell git bisect that the current commit D is bad by running:
1
git bisect bad
Since commits D and G are bad, git bisect assumes the ones in between—E and F—are also bad and ignores them. You will now be taken to the middle of commits A through D:
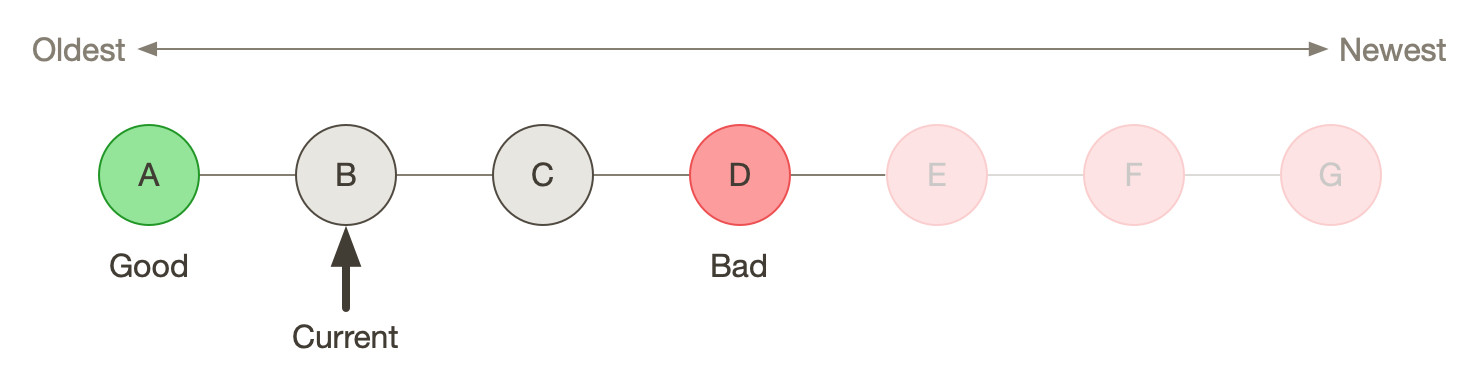
Now the current commit is B. Start the app and test again. Let’s assume the bug is not present here so you’ll mark it as good:
1
git bisect good
If there were any commits between A and B, git bisect would ignore them like it ignored commits E and F. There aren’t though, and you already tested A at the beginning.
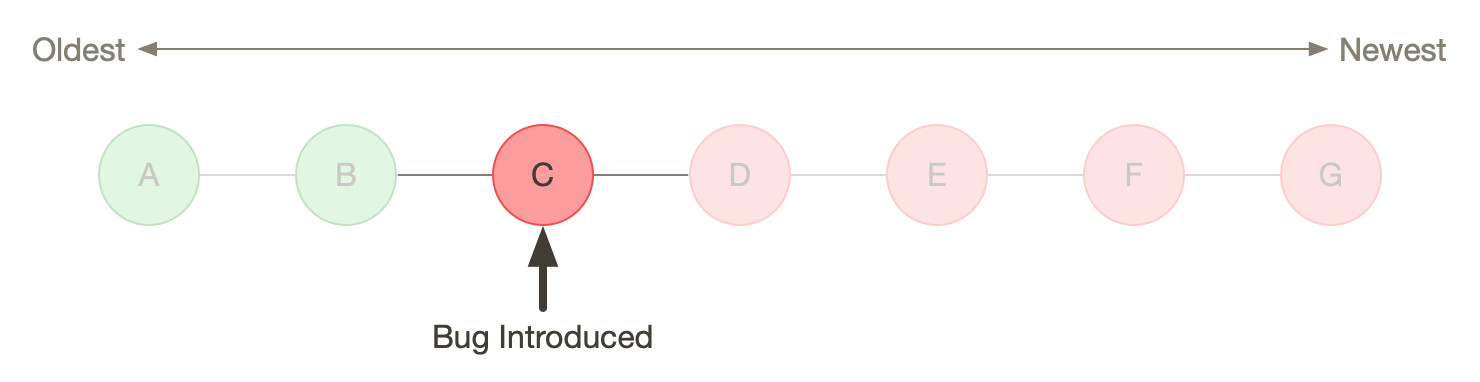
Now you have one last commit to test, commit C. Here is the current state:
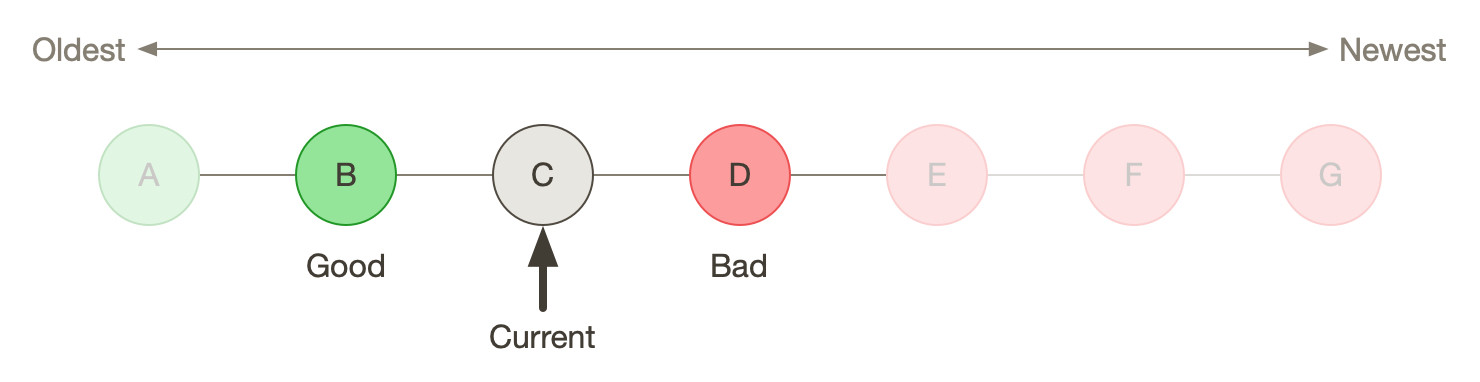
If you test the app and the bug is present, commit C is the one that introduced the bug. If commit C is good, then D introduced the bug.
Let’s say C was bad and you tell git bisect. It will inform you C introduced the bug and the bisect process ends. Here is the final state of commits:
Again, this uses the binary search algorithm. It works by testing the middle item of a list, discarding the half that doesn’t contain what you’re looking for, and repeating until you have one item left.
If you forget how to use git bisect in the future, run tldr git-bisect for a reminder. If you don’t have tldr installed you should check out my article on it to see why it’s worth a look.
Quitting git bisect
At any point in the bisecting process, run git bisect reset to quit the process and return to the commit you started on. You also have to run this when you’re done bisecting.
Finding Intermittent Test Failures
If you’re trying to track down a flaky test, try running the test multiple times for each phase of git bisect. In this example, cargo test runs my test suite, so replace that with your test command.
In Bash, you can write this:
1
for i in `seq 10`; do cargo test; done
In Fish, you can do this:
1
2
3
for i in (seq 10)
  cargo test
end
Hopefully ten times is enough to see a flaky test fail, but adjust the number to suit your needs. Pro tip: don’t run the whole test suite ten times. Figure out a way to run only the test or file you need.
Automatic Bisect Mode
The previous examples use git bisect in manual mode, the default. You have to test each commit by hand somehow—firing up the app, running a test suite, etc. But git bisect also has an automatic mode. You can use it if you have a test that correctly passes or fails for the bug throughout the commit history.
Start git bisect as before by giving it a bad and good commit. Then, instead of testing each commit manually, pass a script (or test command) into git bisect run and it will find the commit for you:
1
2
3
$ git bisect start G A
...
$ git bisect run cargo test
I don’t typically find that code bases have a bug and a failing test for it that make it into the main branch. If you do though, this can speed the process up a lot.
Wrap Up
I hope this helped you understand how git bisect works and how you can use it to track down bugs. I have used it many times to find tricky bugs and fix flaky tests. Narrowing down the introduction of a bug to a single commit is incredibly helpful because it reduces the amount of code you need to sift through. Give this a shot, because having git bisect in your toolbox will help when you need to track down a difficult bug too.