I’ve helped a lot of people set up their terminals for development. I usually give my recommendations and then leave people to figure out a terminal setup that works for them. But many times when I work with them later, I find out they’re using the default Mac Terminal app with no customization at all.
It hurts to see, because your command line can be made so much better with just a little tinkering. I don’t think that I have the best terminal setup in the world. But I strongly believe it’s better than the default experience on a Mac. If you want to get really comfortable with the command line—and all developers should be—this is the place to start.
So I would like to show you how to make your terminal experience amazing. The specific topics I’m going to discuss are:
- Your terminal app
- Your command line prompt
- Setting up helpful Git aliases
- Choosing a shell that works for you
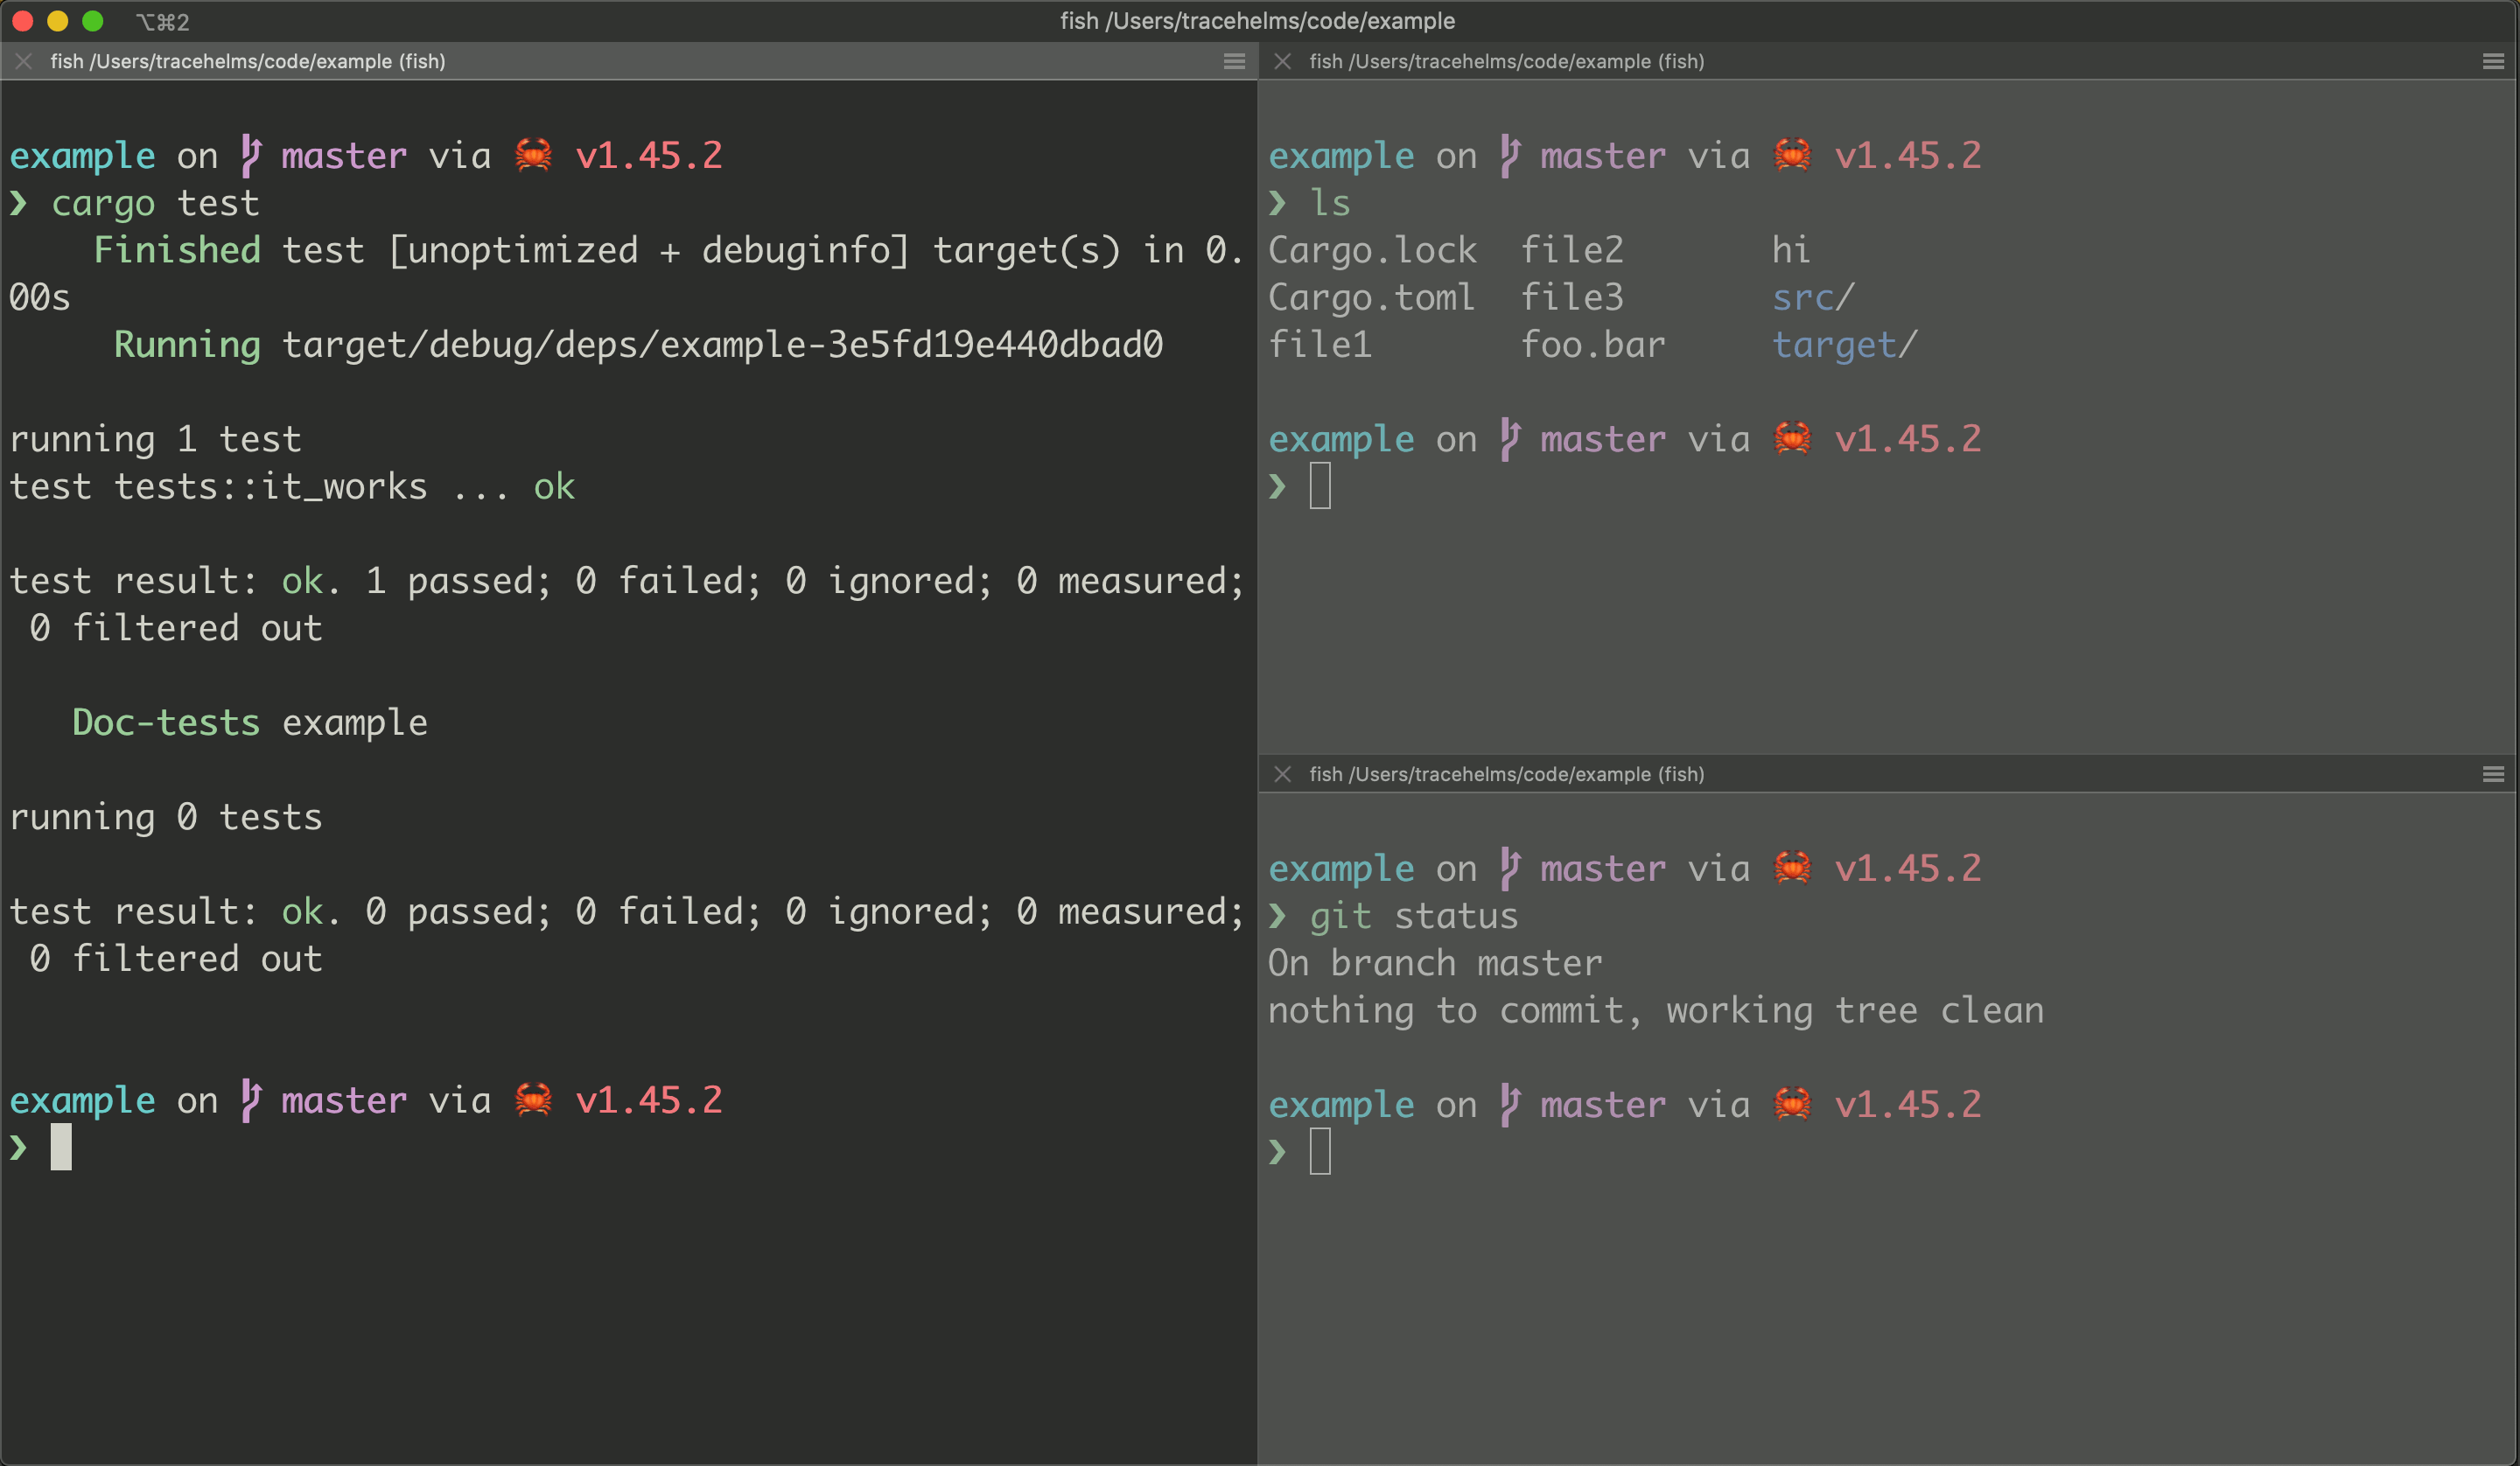
And here’s the experience we’re aiming for:
A Couple Notes
I mainly use a Mac, so these tips are geared towards Mac users. A lot of advice in here will also work with Linux operating systems though.
Also, anywhere you see ~/, that refers to your “home” directory. Your home directory is /Users/yourusername and it’s the default folder you start in when you open the terminal. ~/ is a shorthand for this folder that your computer understands.
Let’s get to it then.
Your Terminal App
I think every developer should be comfortable with the command line, and you need a terminal app in order to access the command line. Mac’s default terminal application, Terminal, is decent. But there’s a better, free alternative called iTerm2. I recommend every developer on a Mac use it.
iTerm2 is better than Terminal for a lot of small reasons—mainly customization—but here’s the big one: you can split each tab into smaller terminal sessions. This is useful for running a development server next to a test watcher, having multiple SSH sessions to different servers in one window, or having a back-end server running next to a front-end server. Here is a simple screenshot showing how iTerm2 windows split:
Like I said, there are a lot of other reasons to use iTerm2 instead of Terminal, but this is the big one. It’s a drop-in replacement on the Mac, so download it, install it, and use it from now on.
Color Schemes
When you start iTerm2 for the first time, you’ll be using the default color scheme. It’ll do in a pinch, but this is your terminal now—make it your own. Picking a color scheme comes down to personal preference, but I recommend finding a color scheme that has a light mode and a dark mode. This way you’ll have a color scheme ready for when you’re next to a sunny window or when you’re working late at night in a dark room.
A popular one that works this way is called Solarized. It uses the same colors in different ways for the light and the dark theme, so it always looks consistent. You can also just pick two different themes, one with a light background and one with a dark background.

You can find packs of color schemes that bundle a bunch of them into one package. The one I like and recommend is Chris Kempson’s Base 16 for iTerm2. He also has packages for popular editors like Vim so you can make your coding apps consistent.
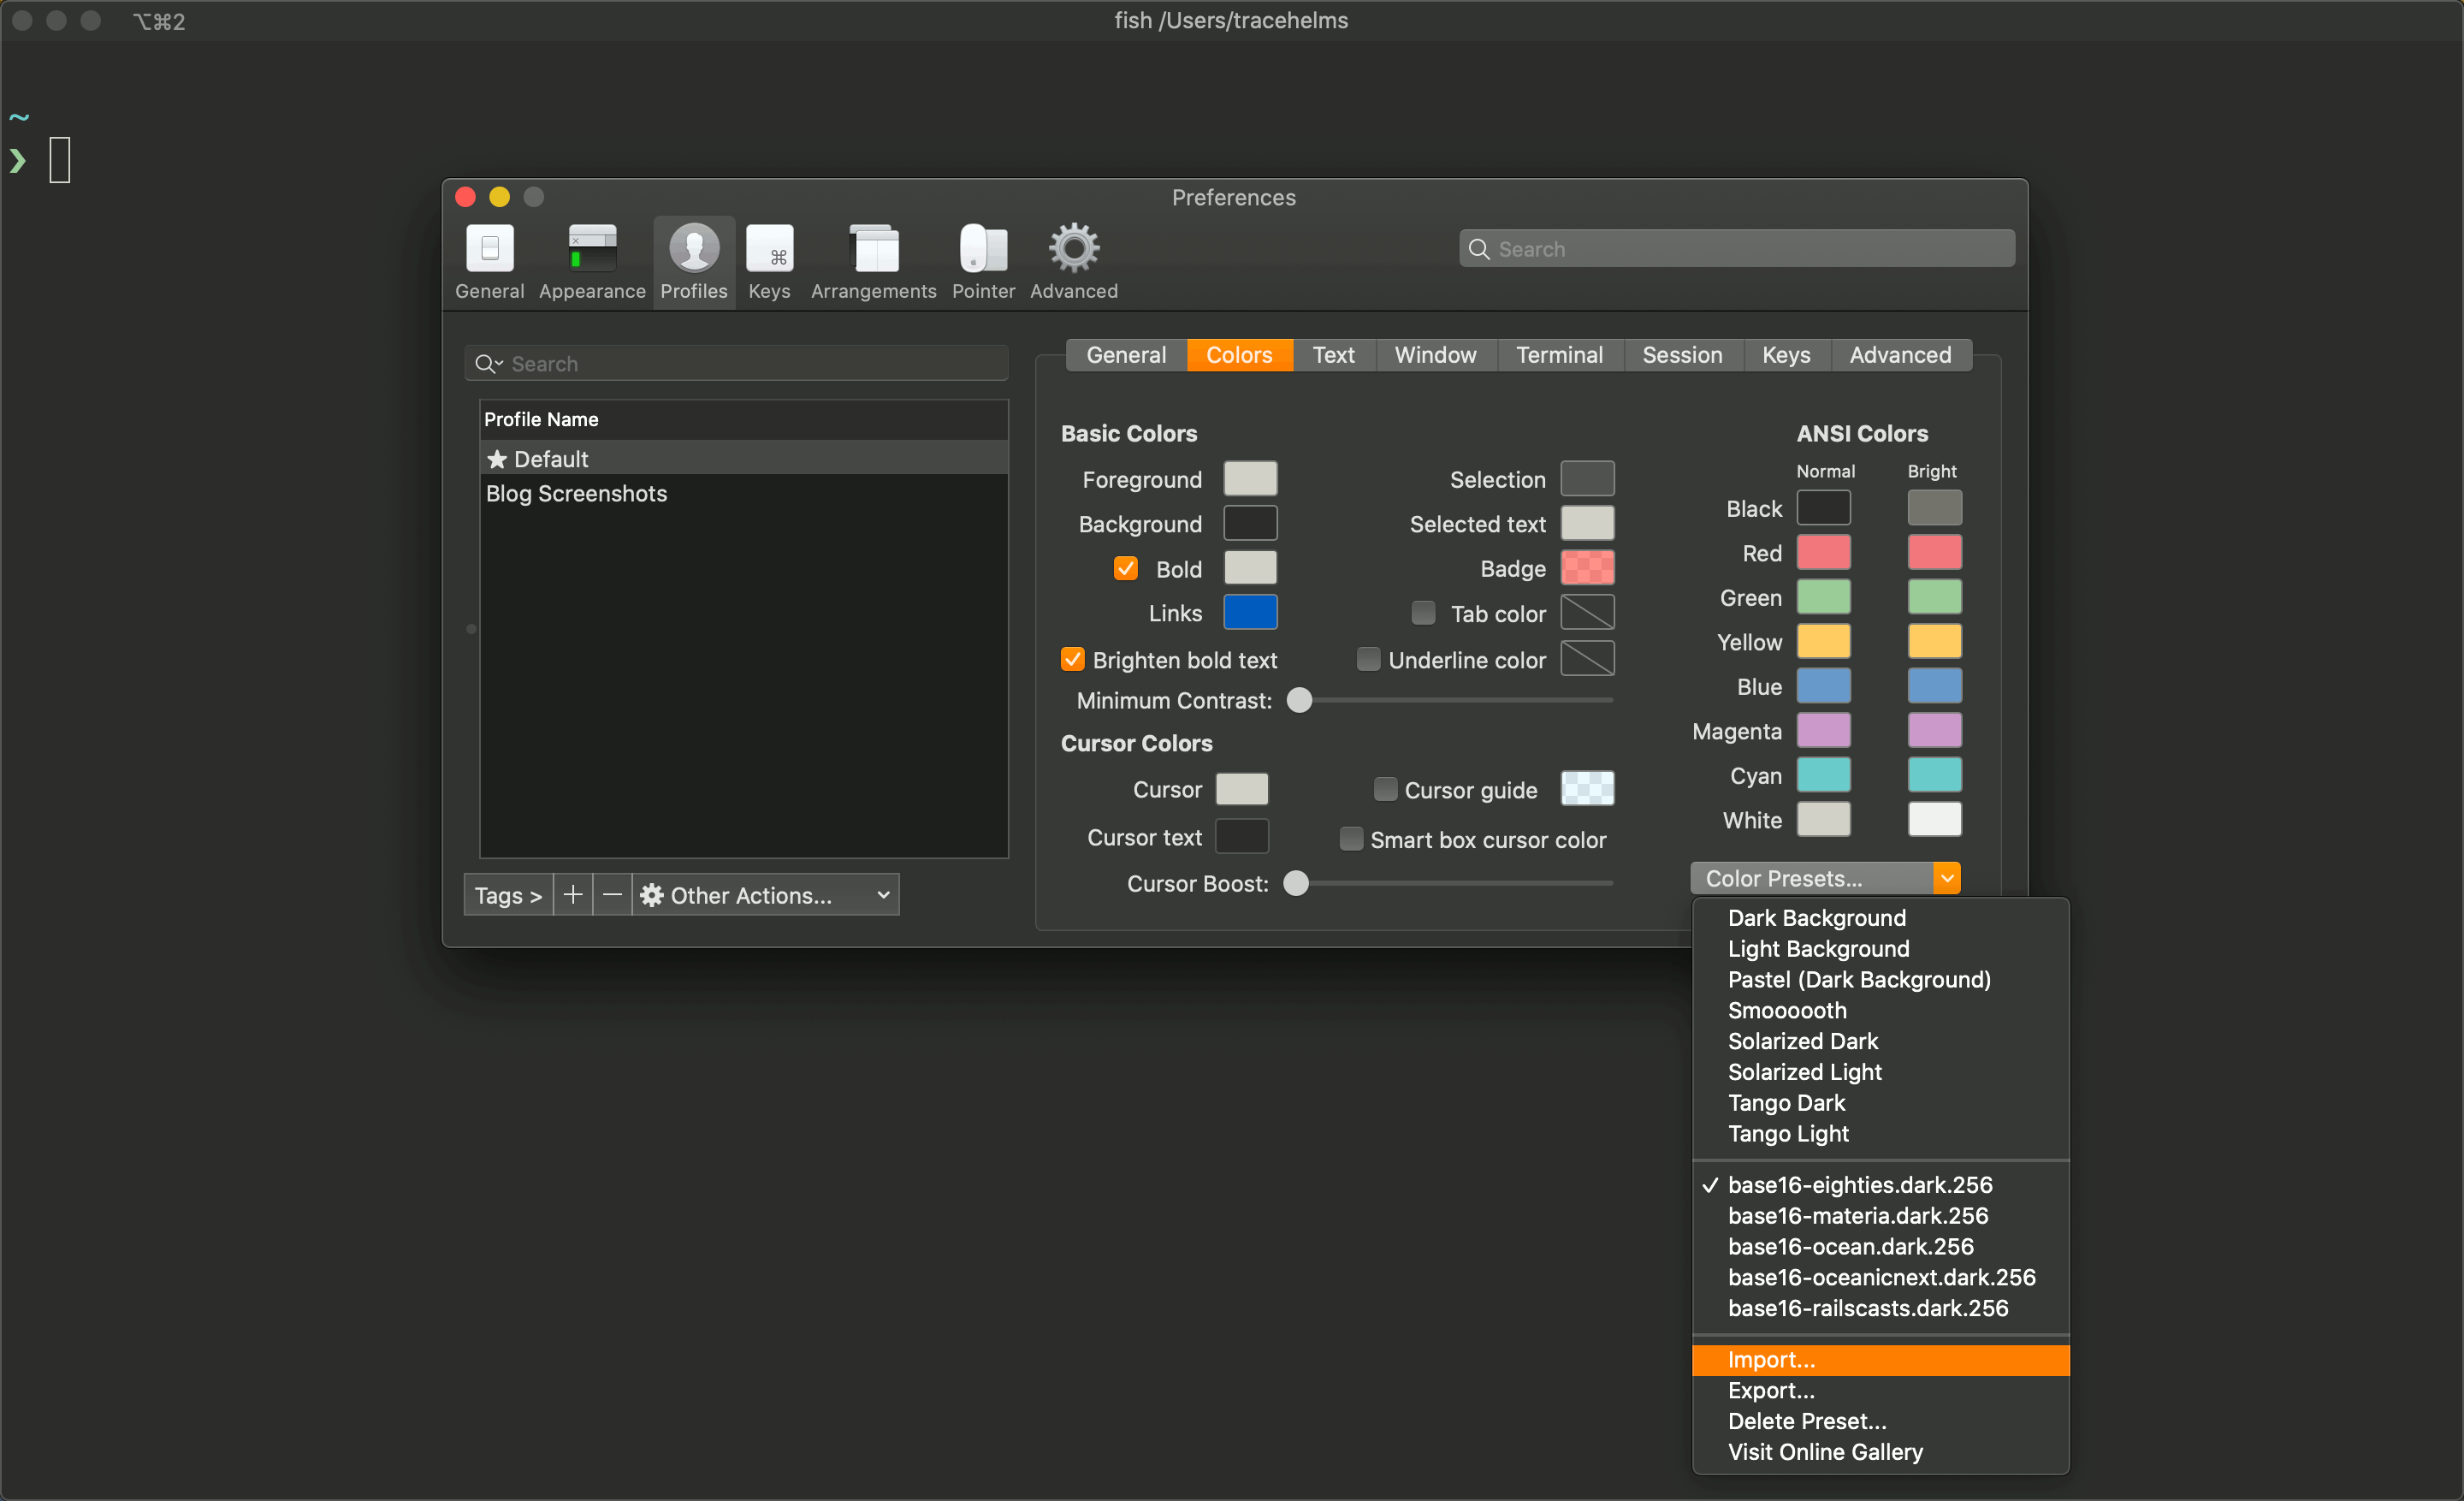
You’ll need to clone the chriskempson/base16-iterm2 repository to a folder on your computer. Once you do that, open iTerm2’s Preferences (Command + ,) and go to the Profiles > Colors tab. In the bottom right you’ll see a dropdown for “Color Presets.” Click that and then “Import” to choose one of the files you just downloaded.
Again, I recommend importing both a “light” and “dark” version of whichever color scheme you end up using. That way you can easily change between them—from this same menu—if you want a lighter or darker screen. Choose the “256” variant of whichever color scheme you pick. I’ve noticed the colors seem off if you don’t but I’m not quite sure why.
And in case you’re wondering, I used the Tomorrow Night Eighties color scheme for most of the screenshots in this post.
Fonts
You might think it’s splitting hairs to pick a custom font, and normally you might be right, but you should install a font that includes special characters for the next section. Otherwise there are some cool symbols that will look like this question mark with a box around it:

And they should look like this:

The font package I like to use is called Powerline Fonts. Clone that repo, follow the setup instructions and you’ll have a whole new set of fonts to choose from. Then you can open iTerm’s preferences and go to Profiles > Text to choose a new Powerline font.

I like the Monaco font, but pick whichever one you like best. This menu is also the place to make your font larger if you want to.
Using Starship As Your Command Line Prompt
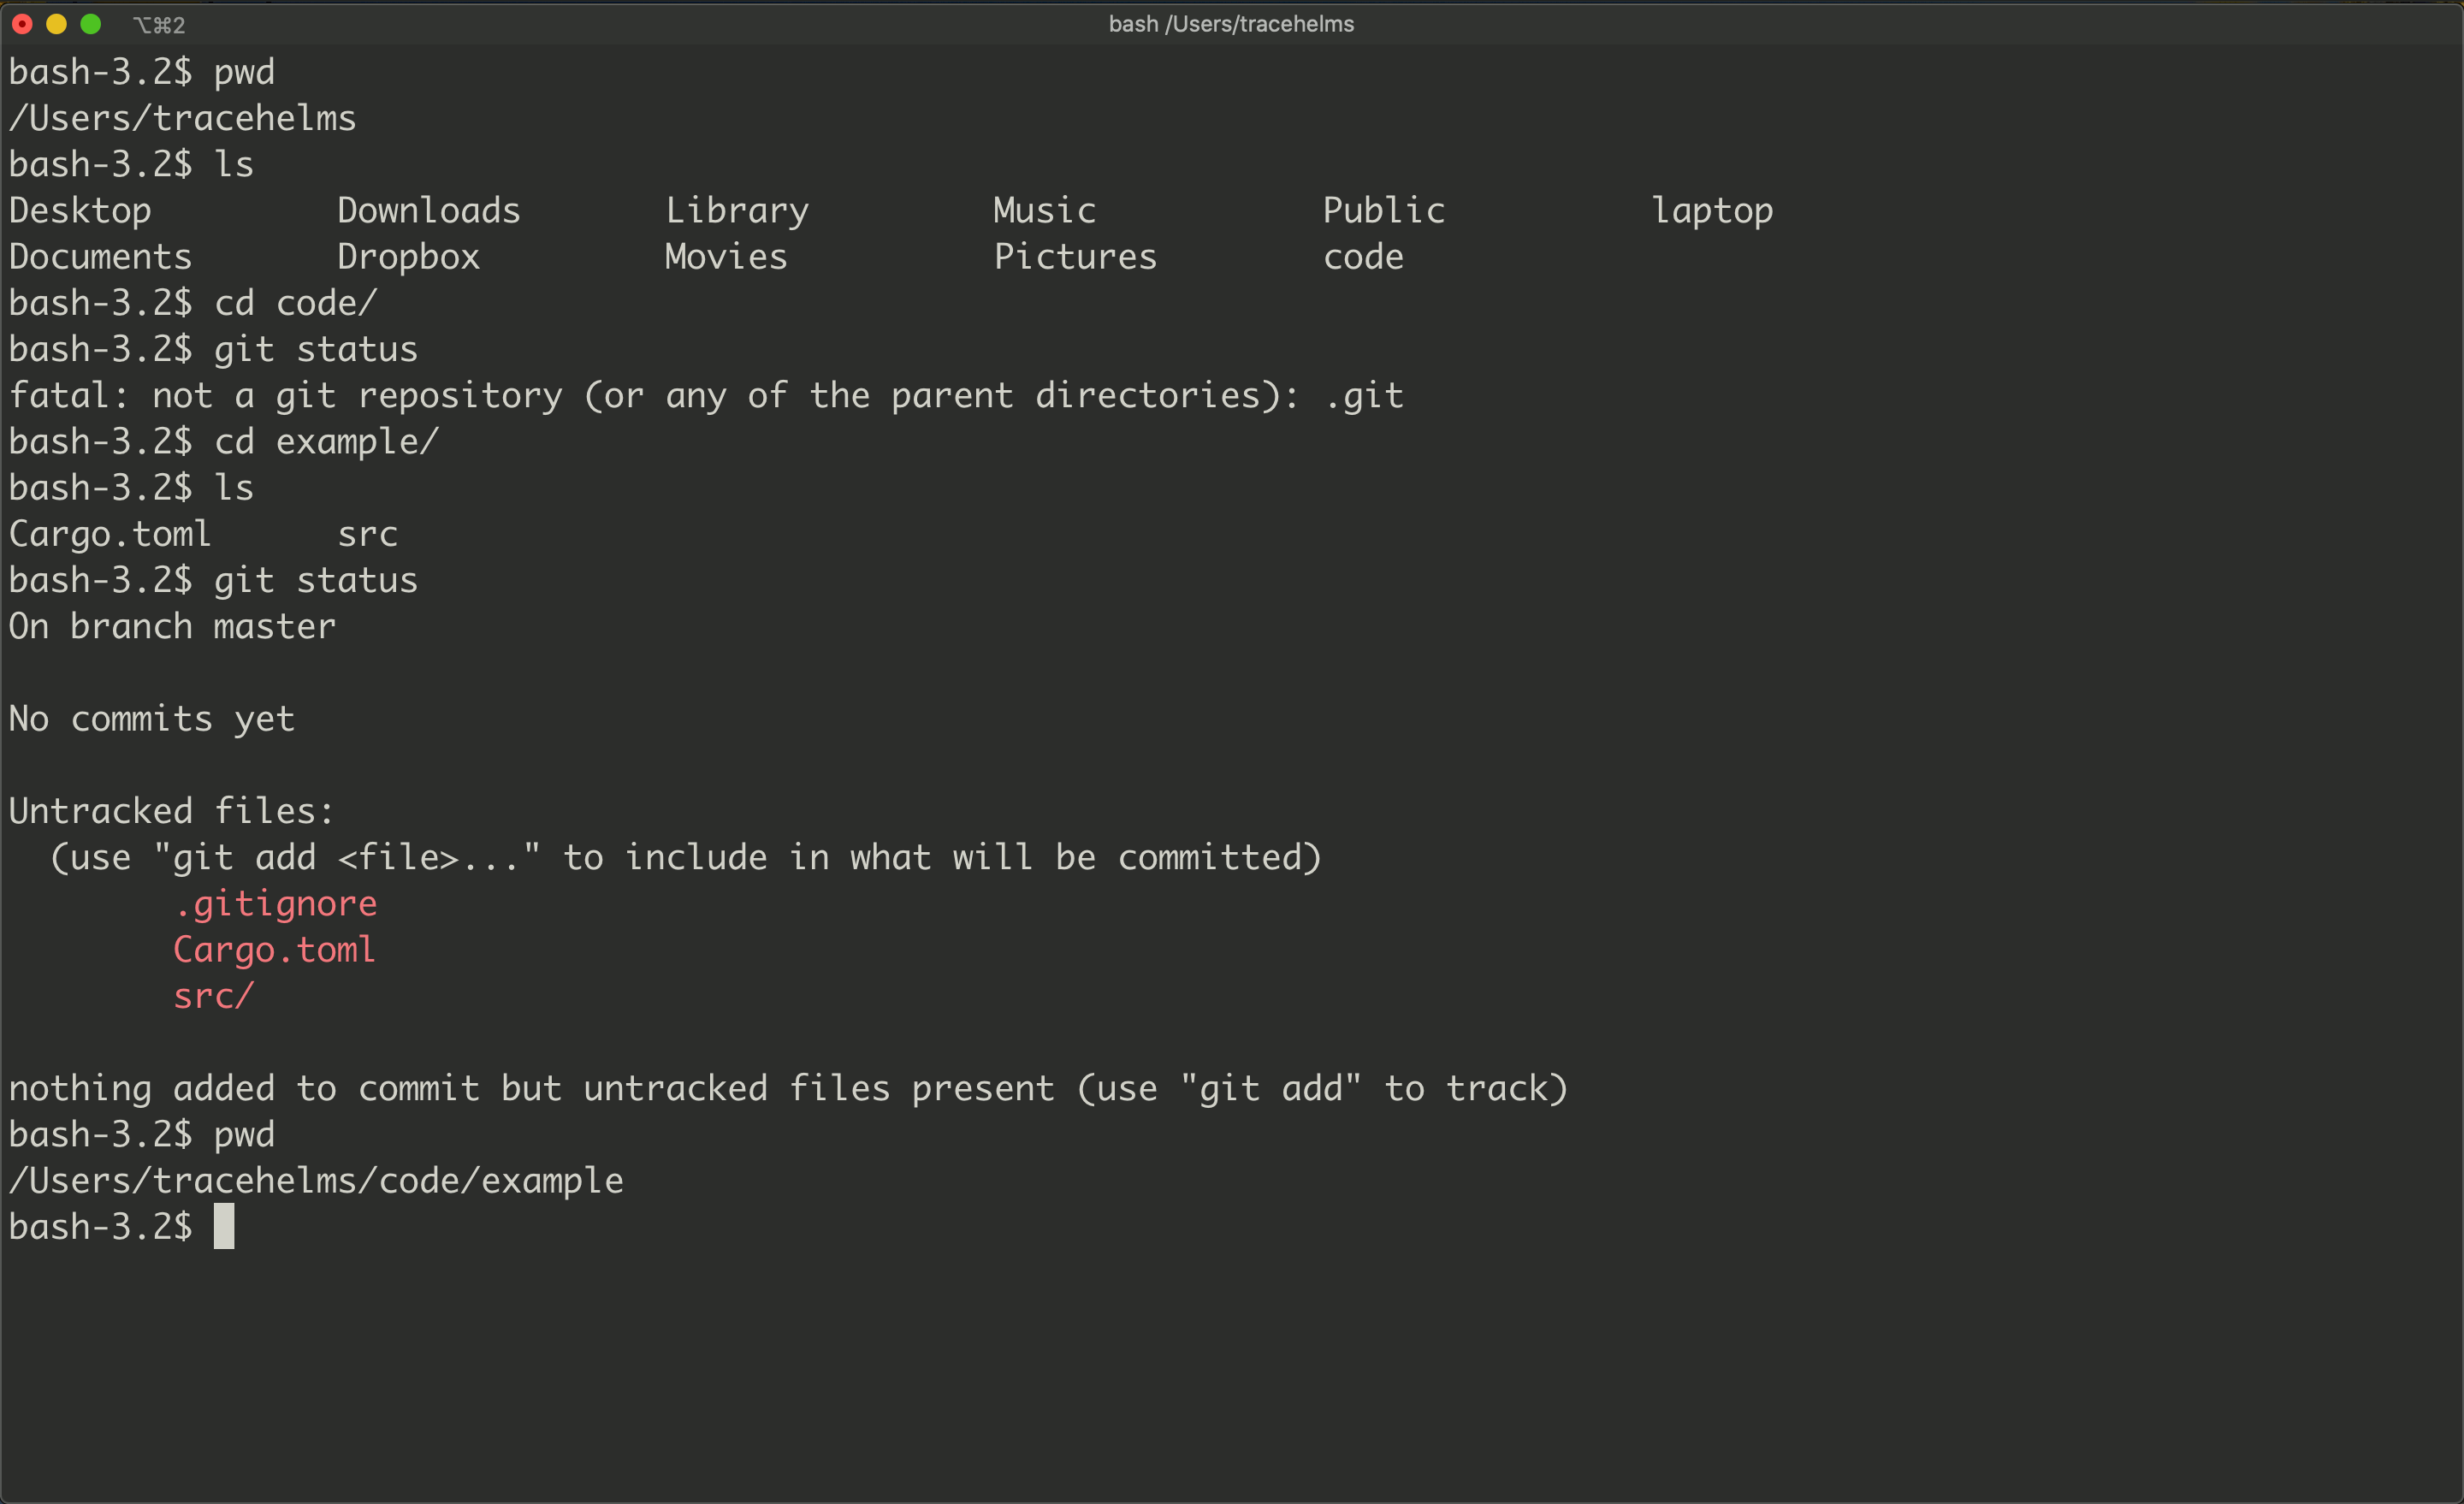
After all of this, you’ll still have a very plain command line prompt—the part that appears before each line you type. You might think it’s O.K. to use the default command line prompt. It’s not. If you come back to an open terminal with the default prompt, do you know what folder you’re in? Do you know if you’re in a Git repository? Are there any uncommitted changes in that repository? You have to execute a command to figure out the answer to each of those questions. They’re simple commands, but typing them every time you want the answer is a massive waste. Your prompt could be answering those questions for you.
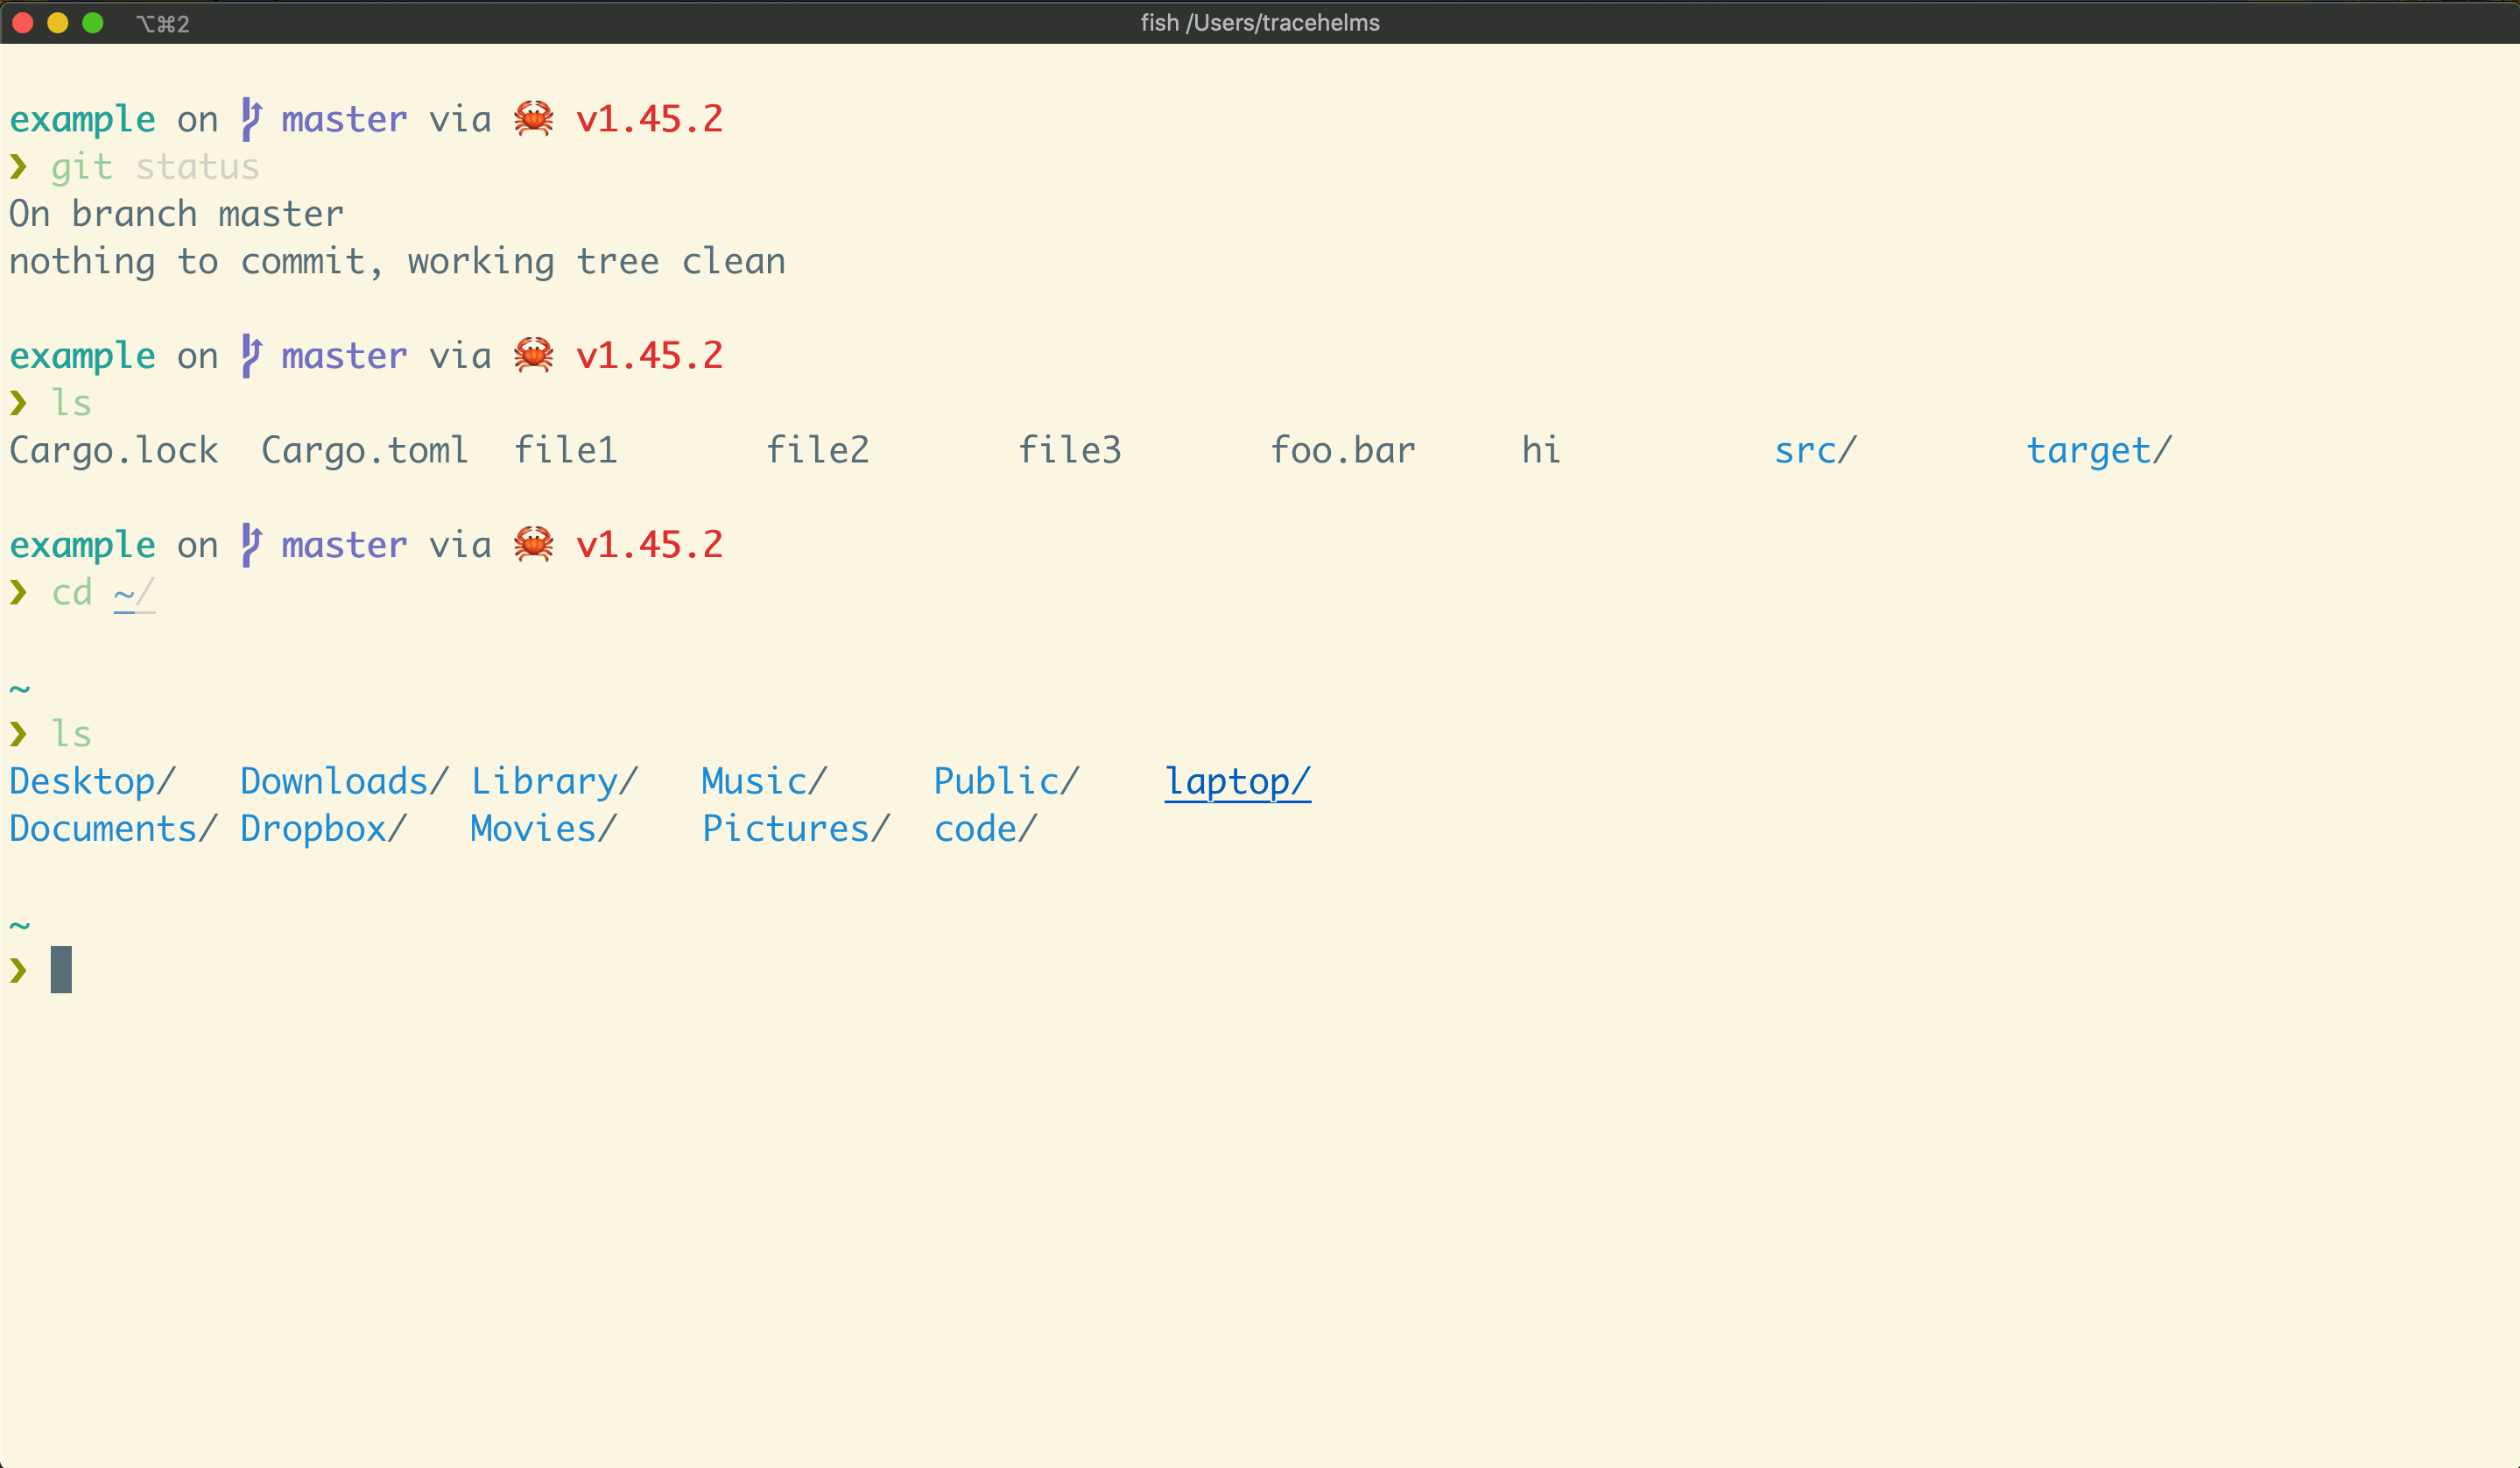
Here’s the default prompt. I have to blindy stumble my way from the home directory to an example code directory. The lack of highlighting also makes it hard to parse each line of text.
And here’s the experience you should be having:
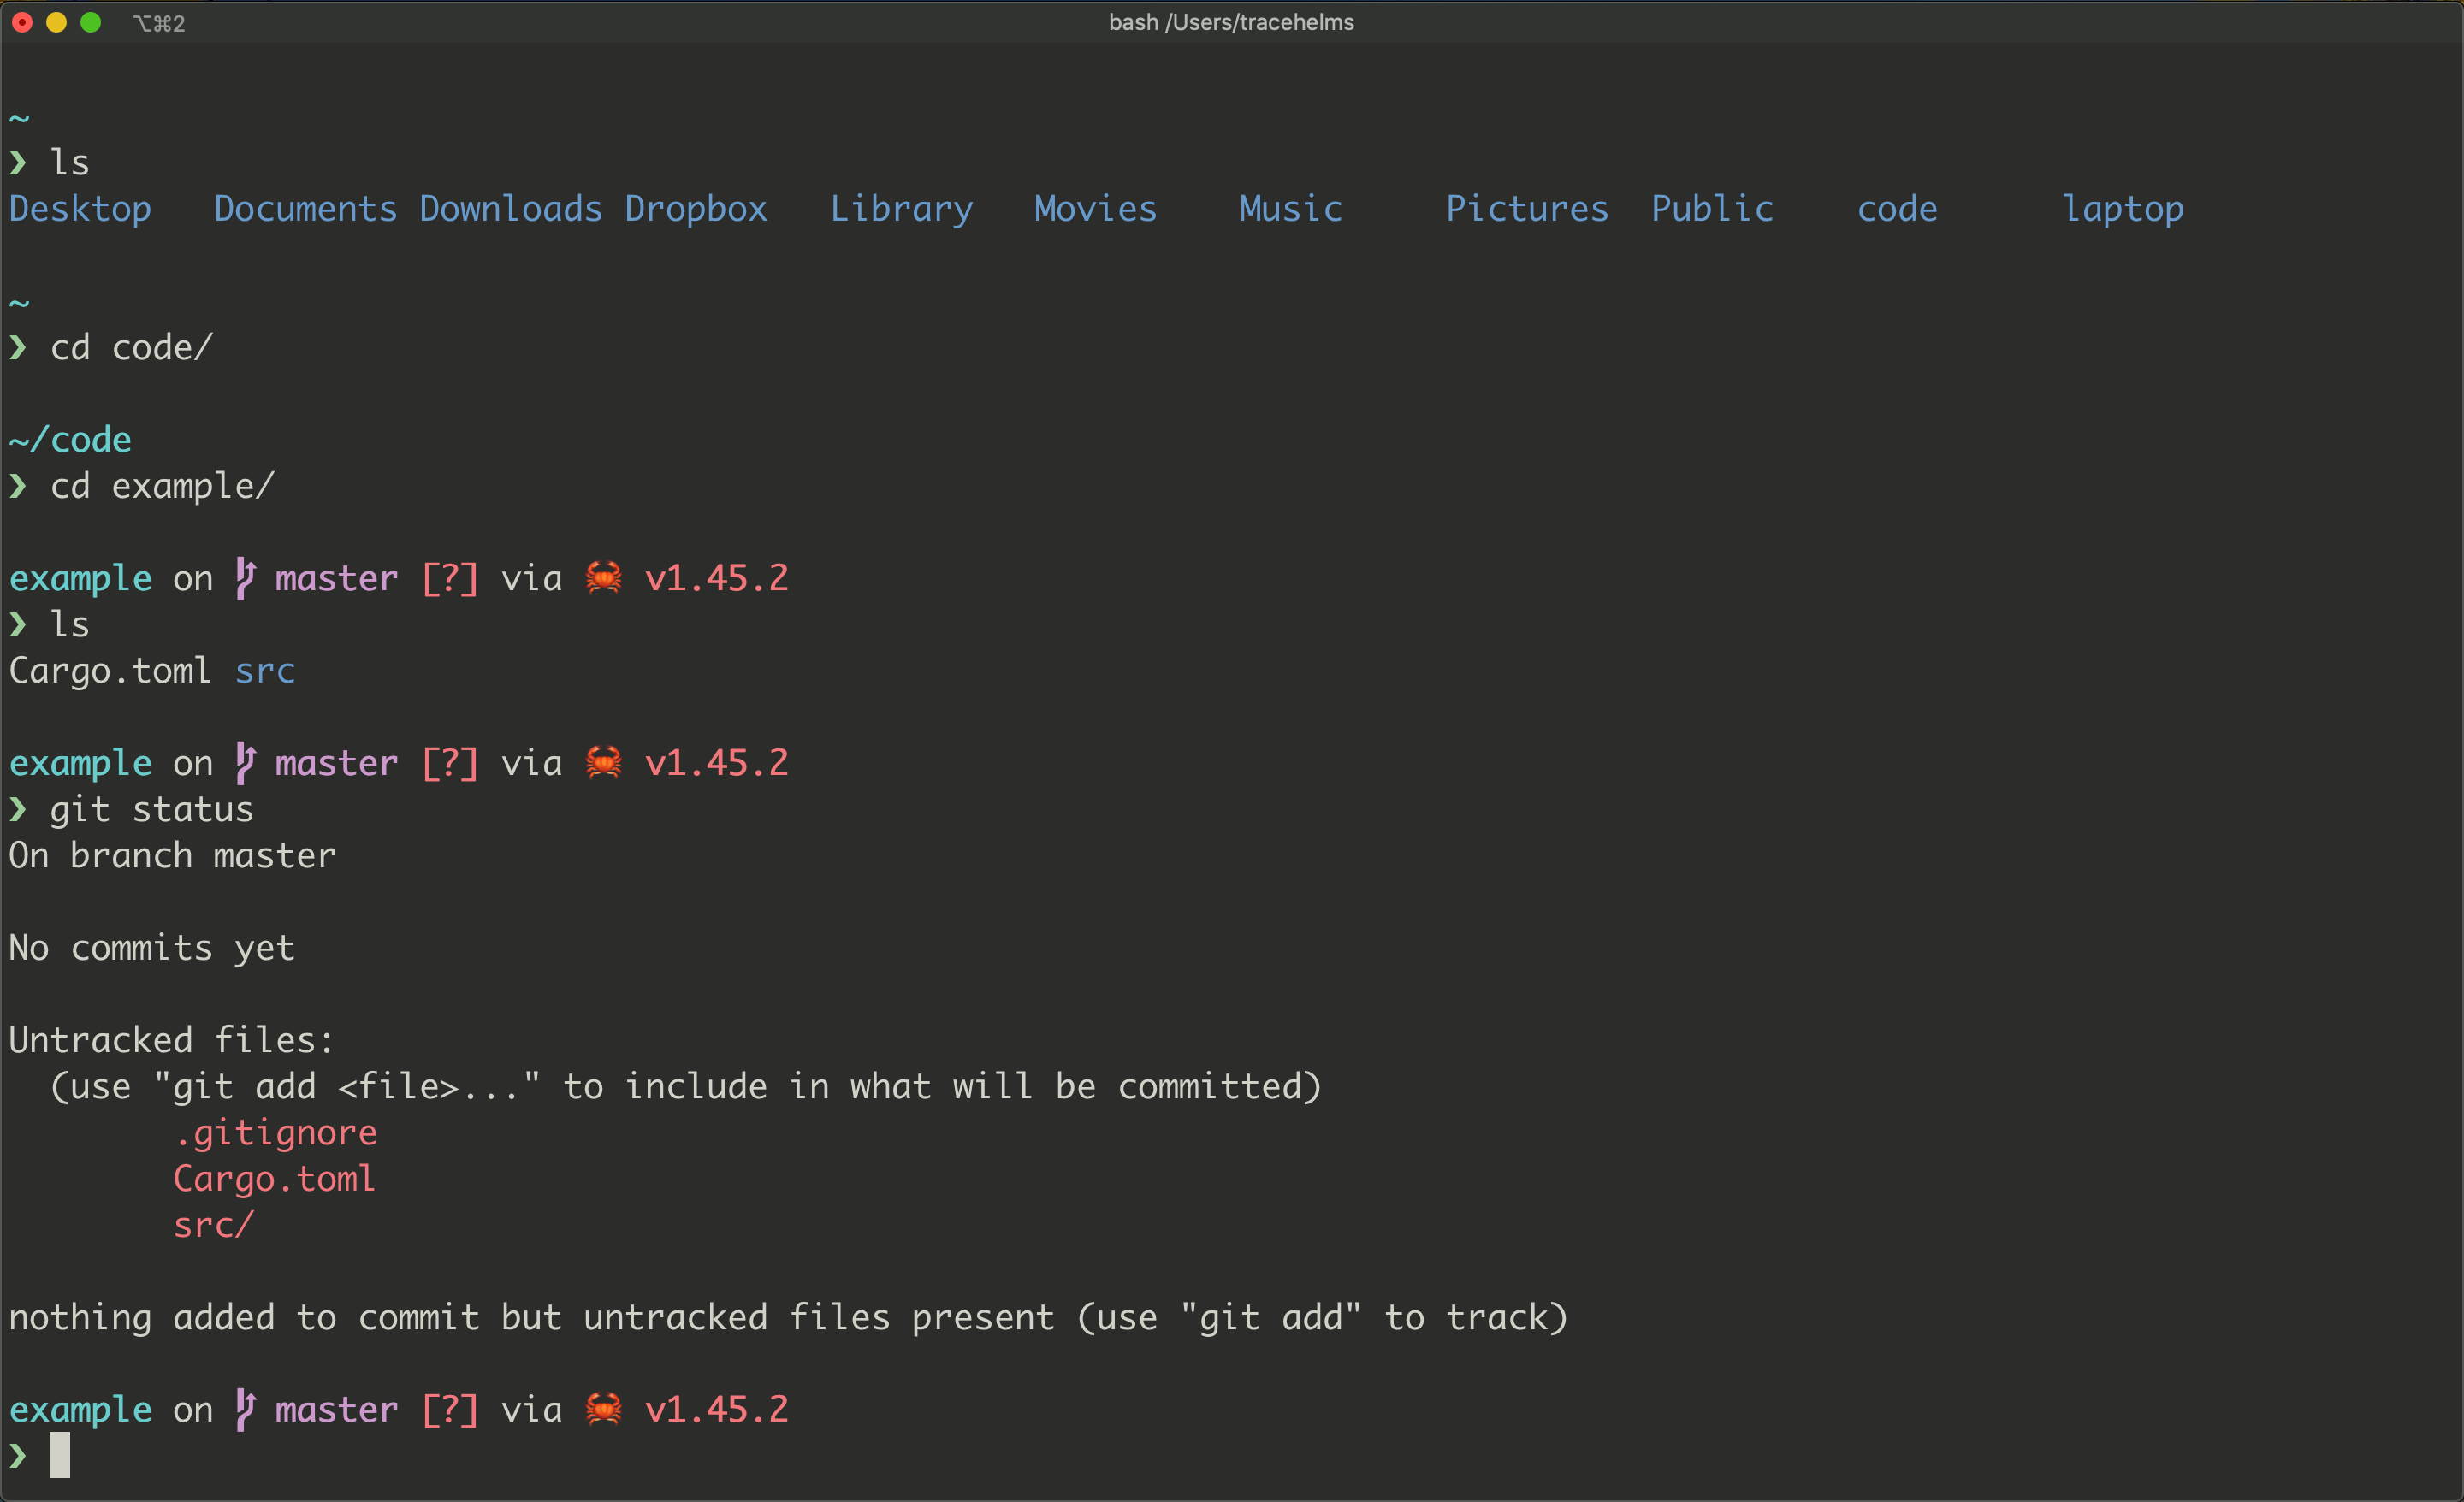
You can get this with one simple tool: the Starship prompt. This prompt is compatible with Bash, Zsh, and Fish so you can try different shells and keep your prompt the same. It has some really useful features like:
- Show the current directory
- Show the current Git branch if you’re in a Git project
- Show the status of that Git project. Do you have uncommitted changes? Are there new commits on GitHub that you don’t have? Have you committed but not pushed your branch?
- How long did the previous command take?
- What was the return status of the previous command? The color of the chevron turns red if the previous command returned a non-zero status (an error).
- Show the active version of the language your current folder’s project, if there is one
These simple features translate into less typing and more awareness as you navigate around the command line. That in turn makes you faster and more comfortable using it.
Starship Setup
Follow Starship’s installation instructions to set it up for your current shell. To find out which shell you’re currently using, you can run this command:
1
echo $SHELL
The default configuration for Starship is great, but I find the package and language versions a little noisy. They’re also slow to compute for some languages like Elixir. The Rust version is fast to compute and I like the crab emoji, so I leave that one turned on. I also almost always have something stashed in my Git repositories, so I turn the notification of stashes off to keep the noise down.
If you want to do the same thing, you can place this configuration into the ~/.config/starship.toml file:
1
2
3
4
5
6
7
8
9
10
11
12
13
14
15
16
17
[python]
disabled = true

[elixir]
disabled = true

[nodejs]
disabled = true

[package]
disabled = true

[aws]
disabled = true

[git_status]
stashed = ""
Git Aliases
If you use Git in the command line a lot, you might start to feel like the commands require too much typing. They’re also easy to type incorrectly or forget. You can add aliases to your Git configuration to make typing the common commands easy and less error-prone.
If your ~/.gitconfig file is empty, you need to run git config to go through the initial setup. After that, place this at the bottom of your ~/.gitconfig file:
1
2
3
4
5
6
7
8
9
10
11
[alias]
co = checkout # git co my-branch
po = pull origin # git po my-branch
pso = push origin # git pso my-branch
cm = commit -m # git cm "your commit message"
br = branch # git br -D my-branch
st = status # git st
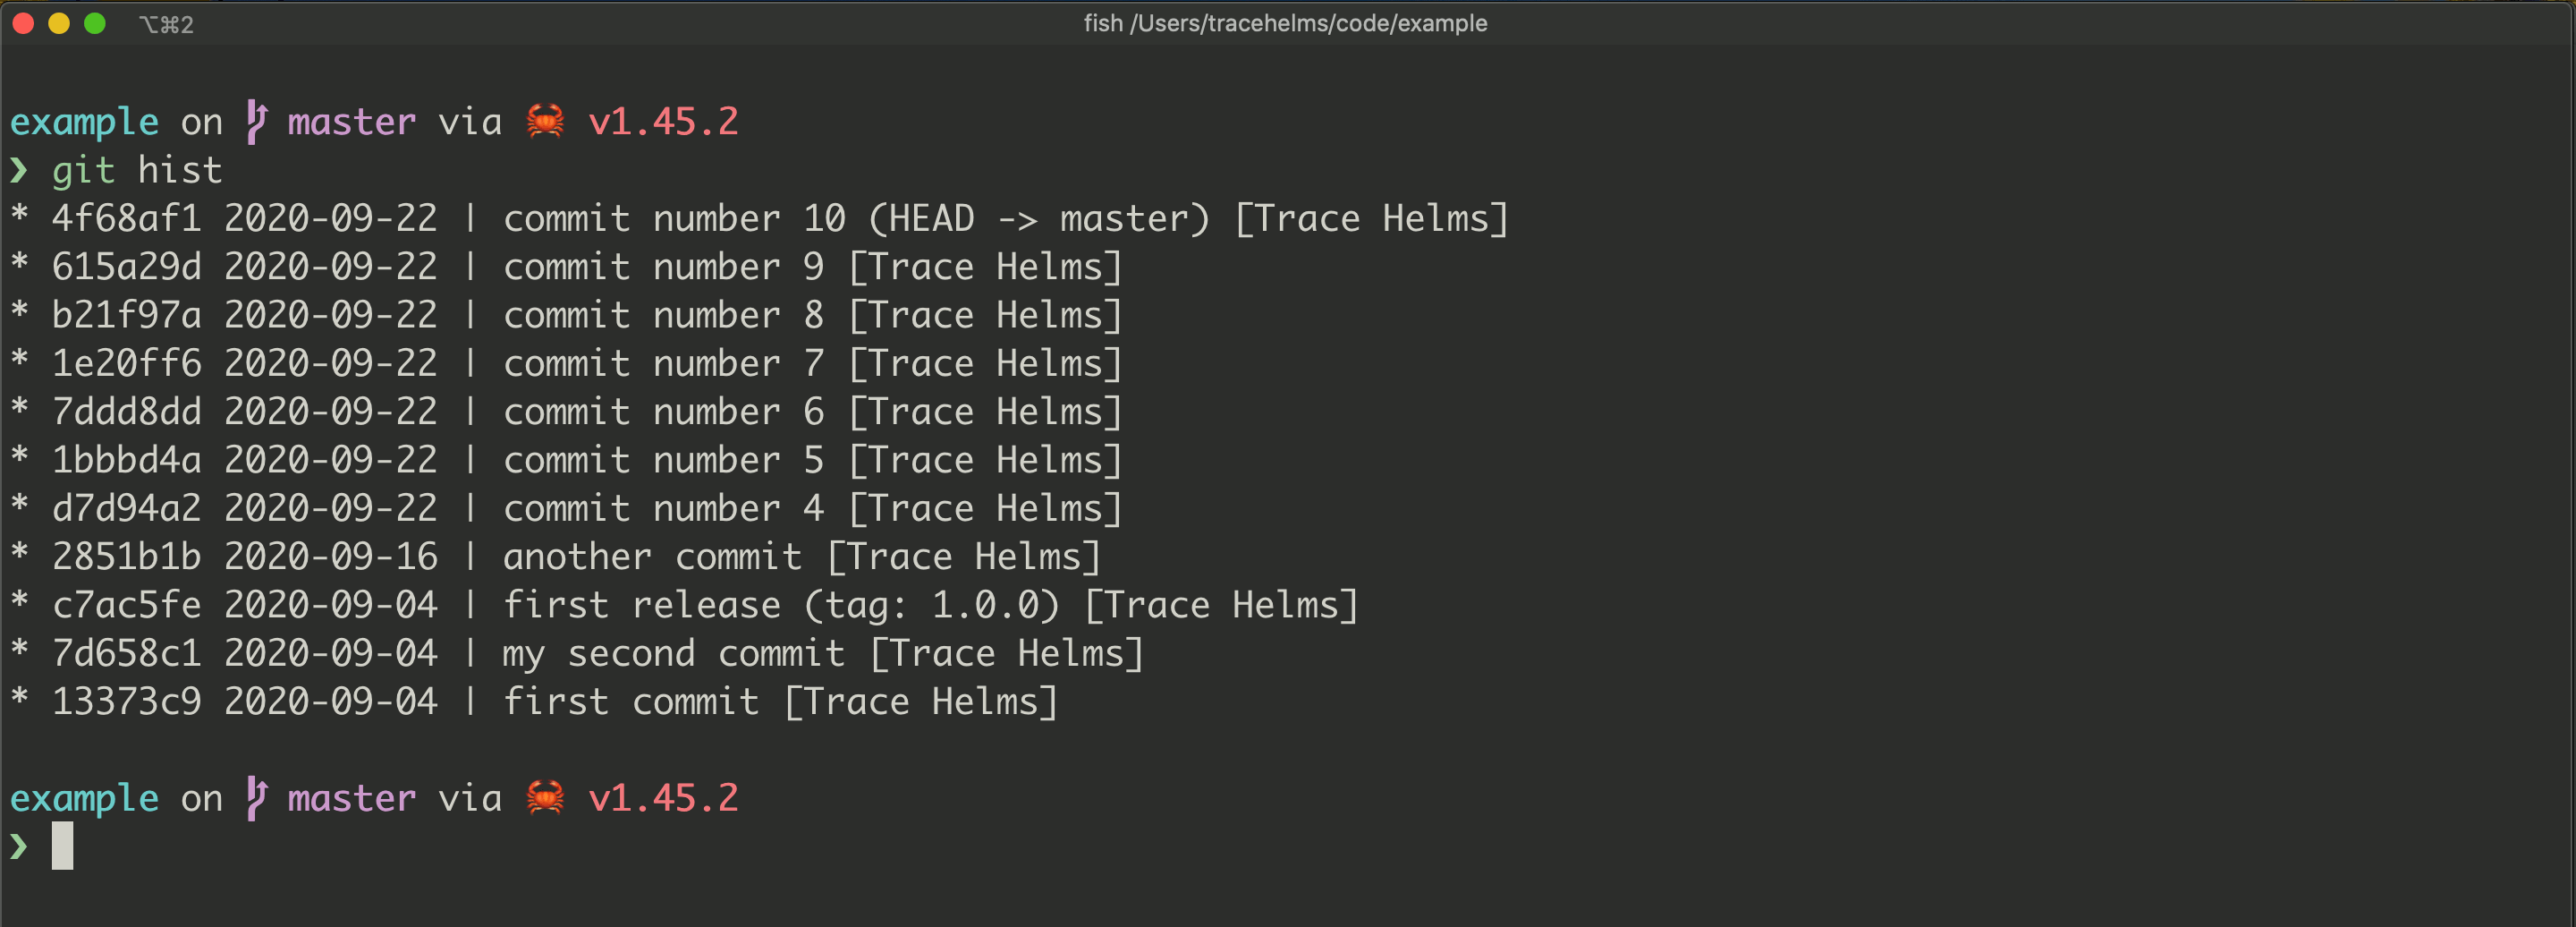
hist = log --pretty=format:'%h %ad | %s%d [%an]' --graph --date=short
# git hist
dns = diff --ignore-space-change # git dns (dns stands for diff no space)
dc = diff --cached # git dc
Now instead of git status, you can type git st. Instead of git checkout my-feature, you can type git co my-feature.
My favorite alias is git hist. It’s hard to get an overview of the recent history with the standard git log in a busy project. The git hist command shows each commit on one line, so you can very quickly get a sense of the history. Once you find a commit you’re interested in, you can use git show <commit-hash> to see the full commit message.
Compare the default git log:
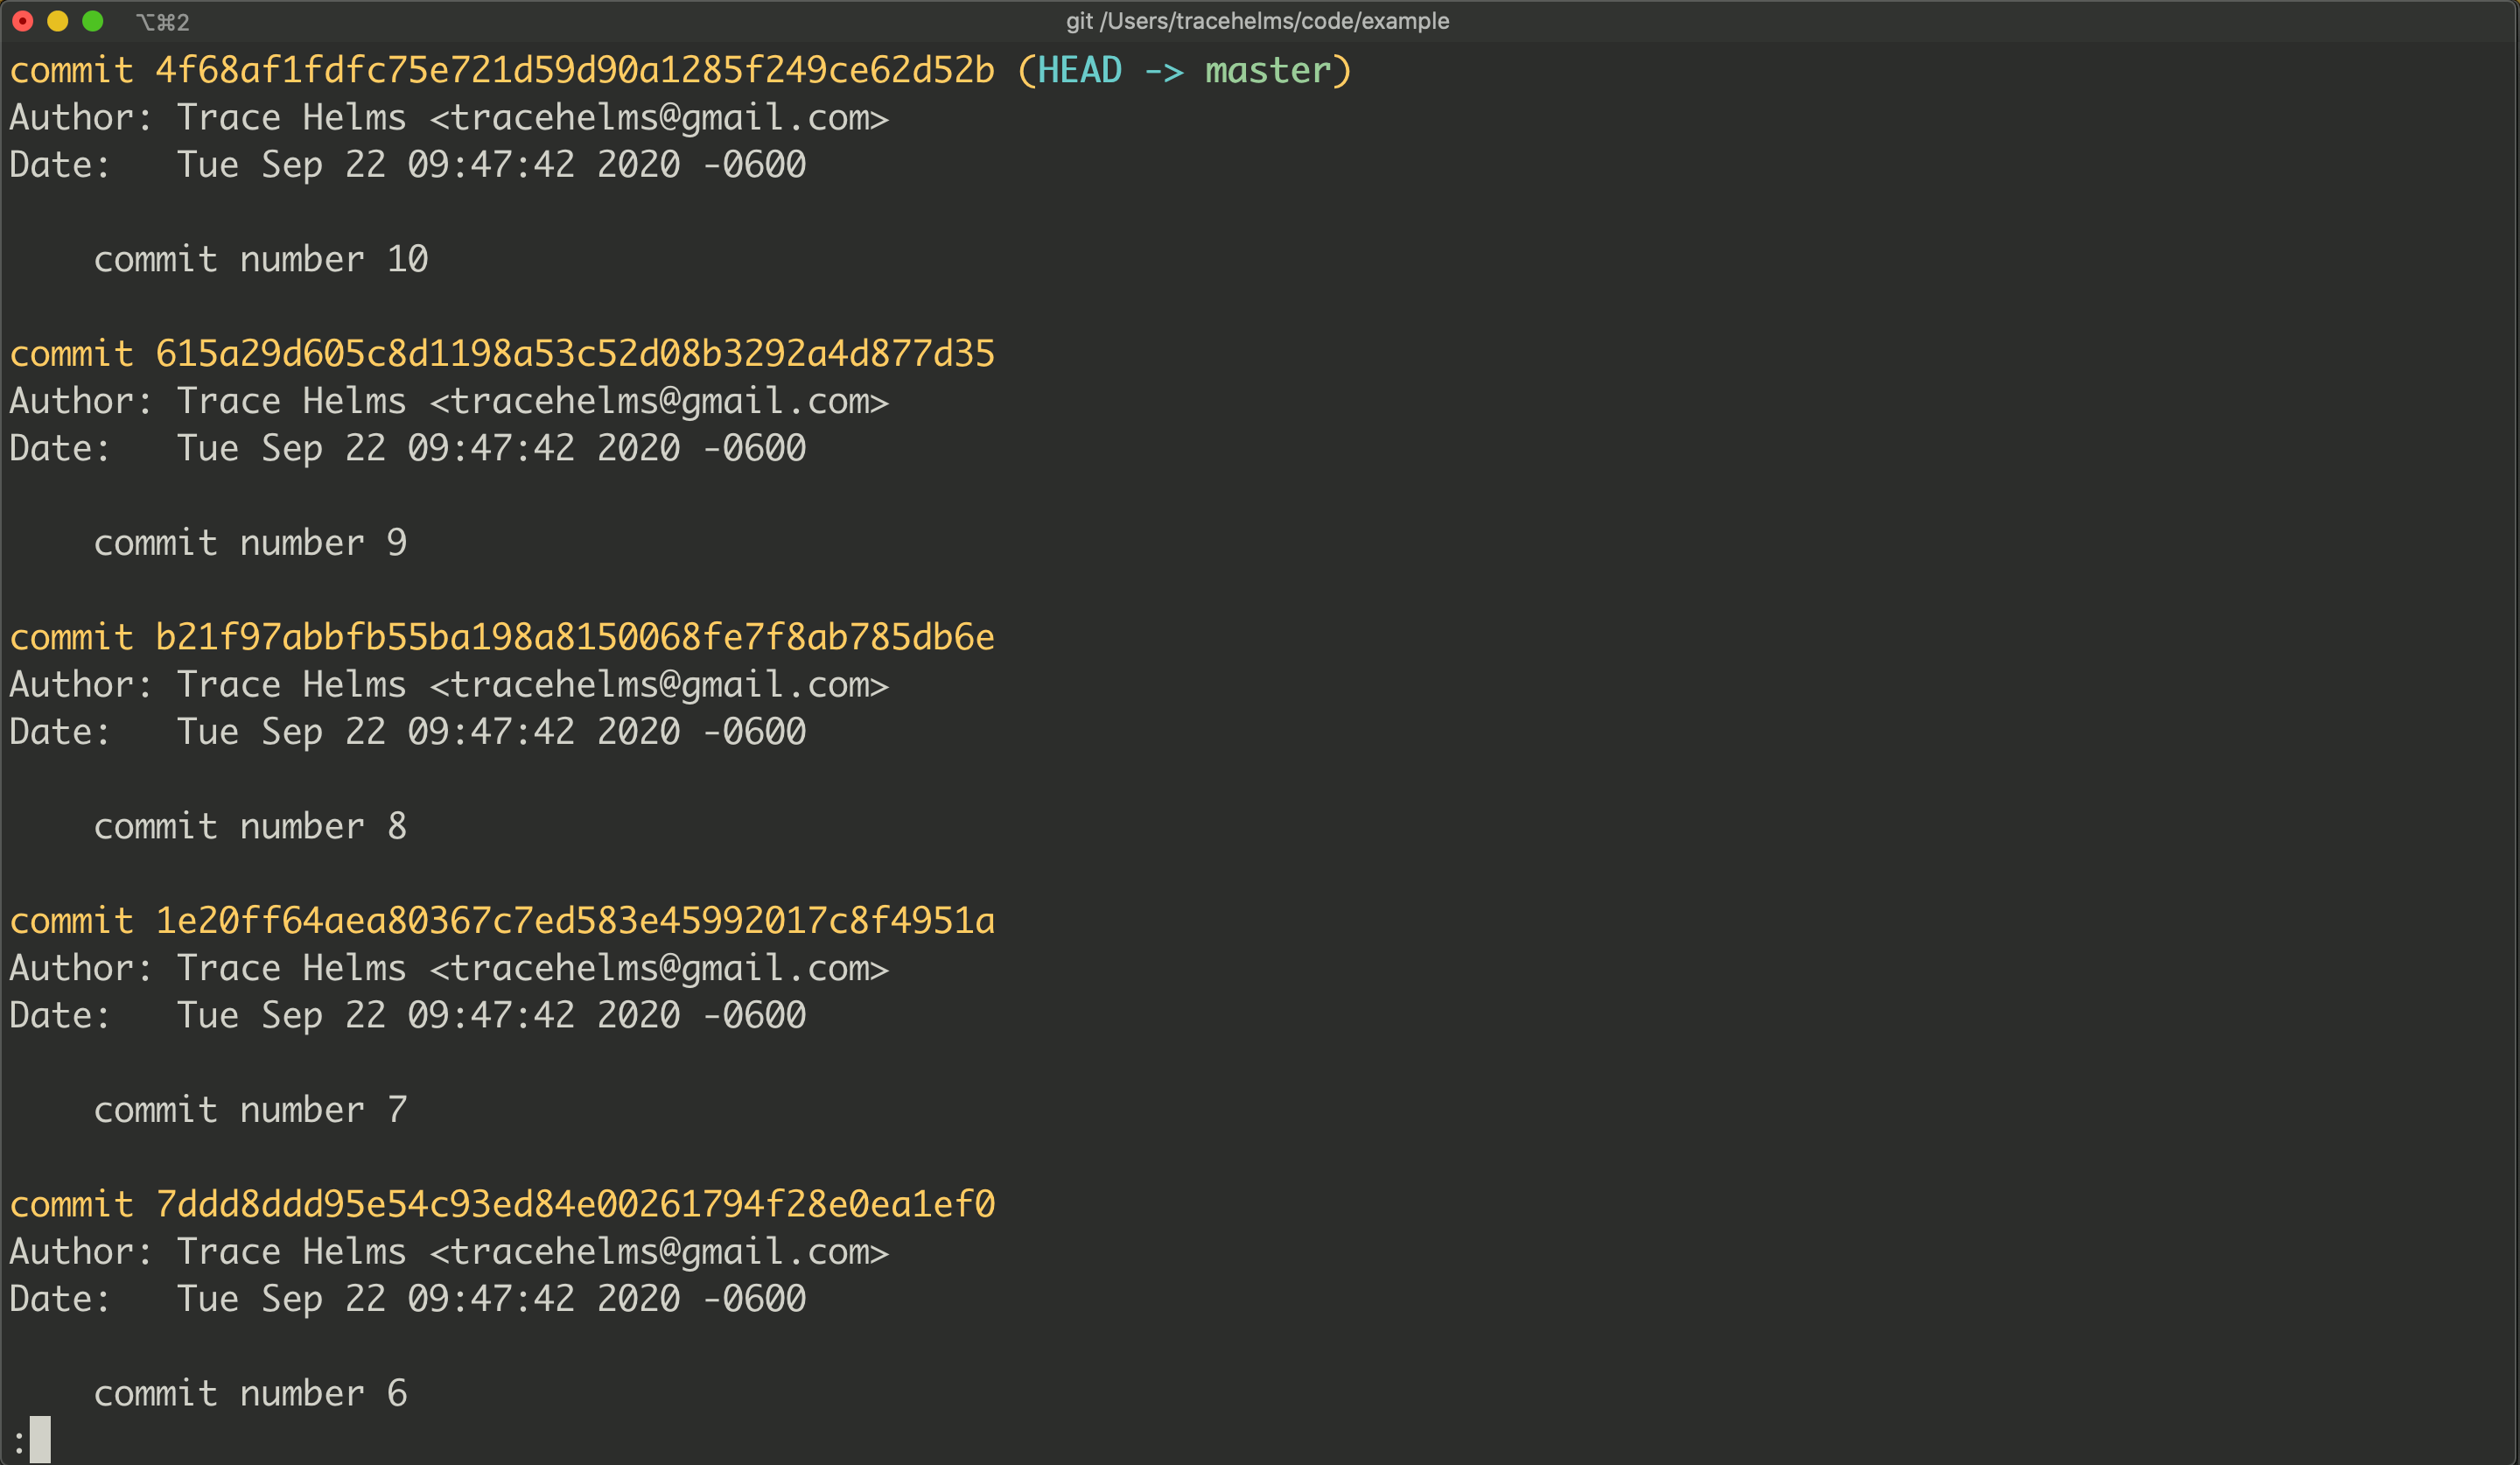
With the git hist alias:
Again, these seem like simple additions, but they all start to add up to make you fast and comfortable using the command line.
Choosing Your Shell
A shell is the part of your terminal that interprets what you type and runs those commands. Most people use the default shell and it works for them. Mac’s default shell used to be Bash but is now Zsh for licensing reasons. You may wonder why anyone would change the default shell, but some newer shells offer really helpful features that older ones don’t. Each one has trade-offs and it mostly comes down to personal preference.
Because it’s mostly personal preference, I’ll leave you with some simple advice.
Bash
If you’re new to the terminal, use Bash. Most terminal commands you find on the internet—like blog posts and Stack Overflow answers—assume you’re using Bash. Also, if you ever have to SSH into a server, it will be running Bash 99% of the time.
If you’re using Bash on a Mac (run echo $SHELL to find out), it’s likely a very old version. Install the latest version via Homebrew and then set it to be your current shell—chsh stands for “change shell”—with the command:
1
2
brew install bash
chsh -s /usr/local/bin/bash
You can also install cool plugins for Bash with frameworks like bash-it. This helps Bash to feel like a newer shell with modern features.
Zsh
I don’t have any experience with Zsh so I can’t say much about it. It seems to be a middle ground between Bash and Fish—it has a more normal syntax like Bash but better auto-completion like Fish.
Fish
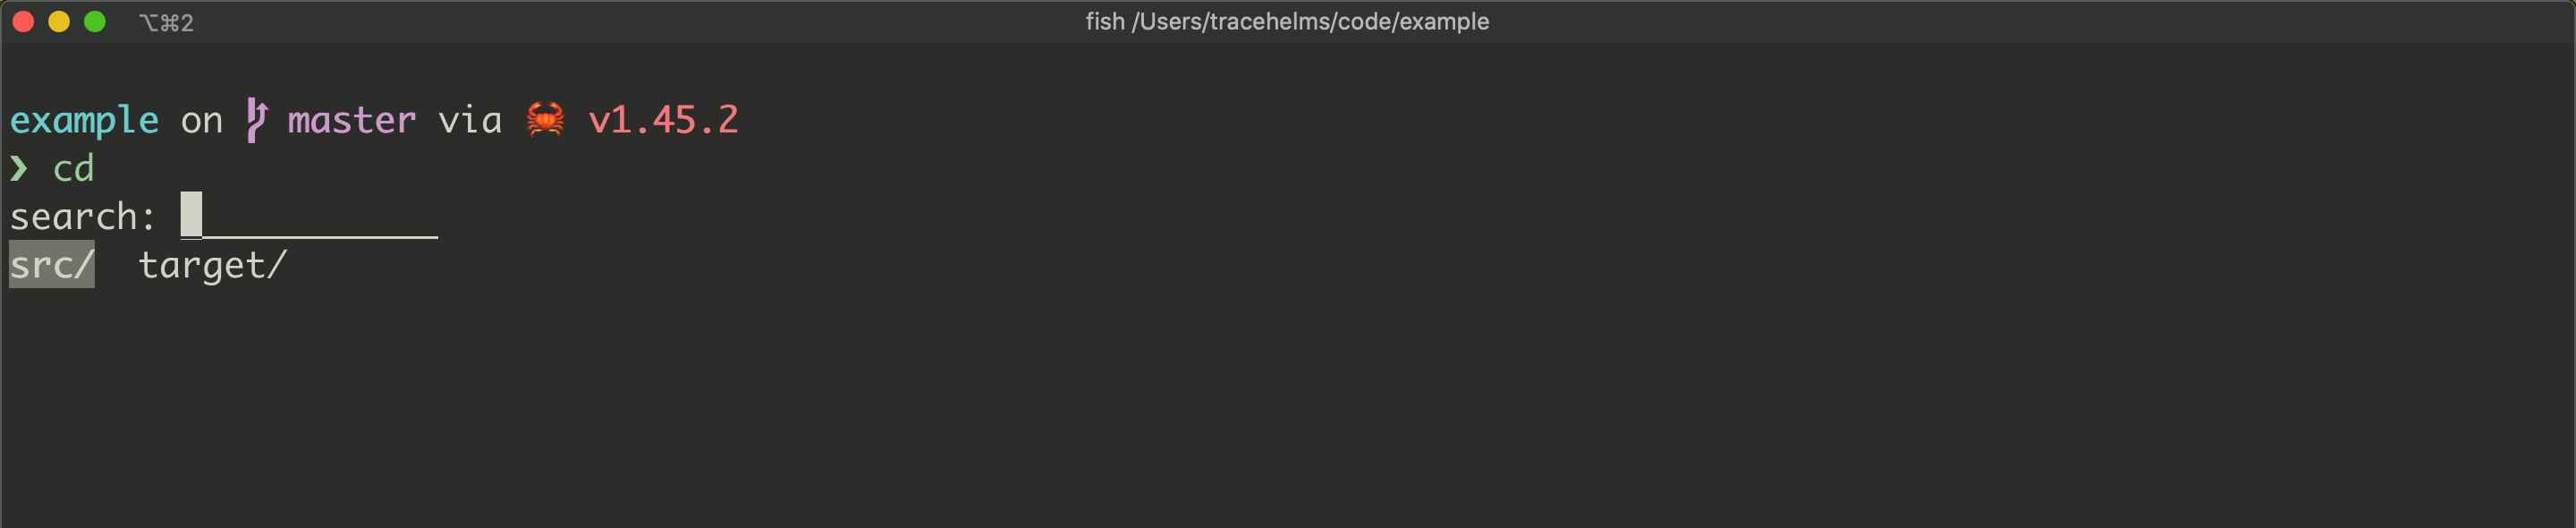
If you’ve been using the terminal for a while and know Bash, or if you simply want the best experience, use Fish. It has amazing auto-complete and search features. Be warned though, it won’t run some commands that normally work in Bash and the syntax is sometimes different. The documentation is great, but it can be harder to find answers to questions you have on the internet.
The auto-completion in Fish is the best out of the bunch. It gives you a fuzzy search (Shift + Tab) for most commands, like cd:
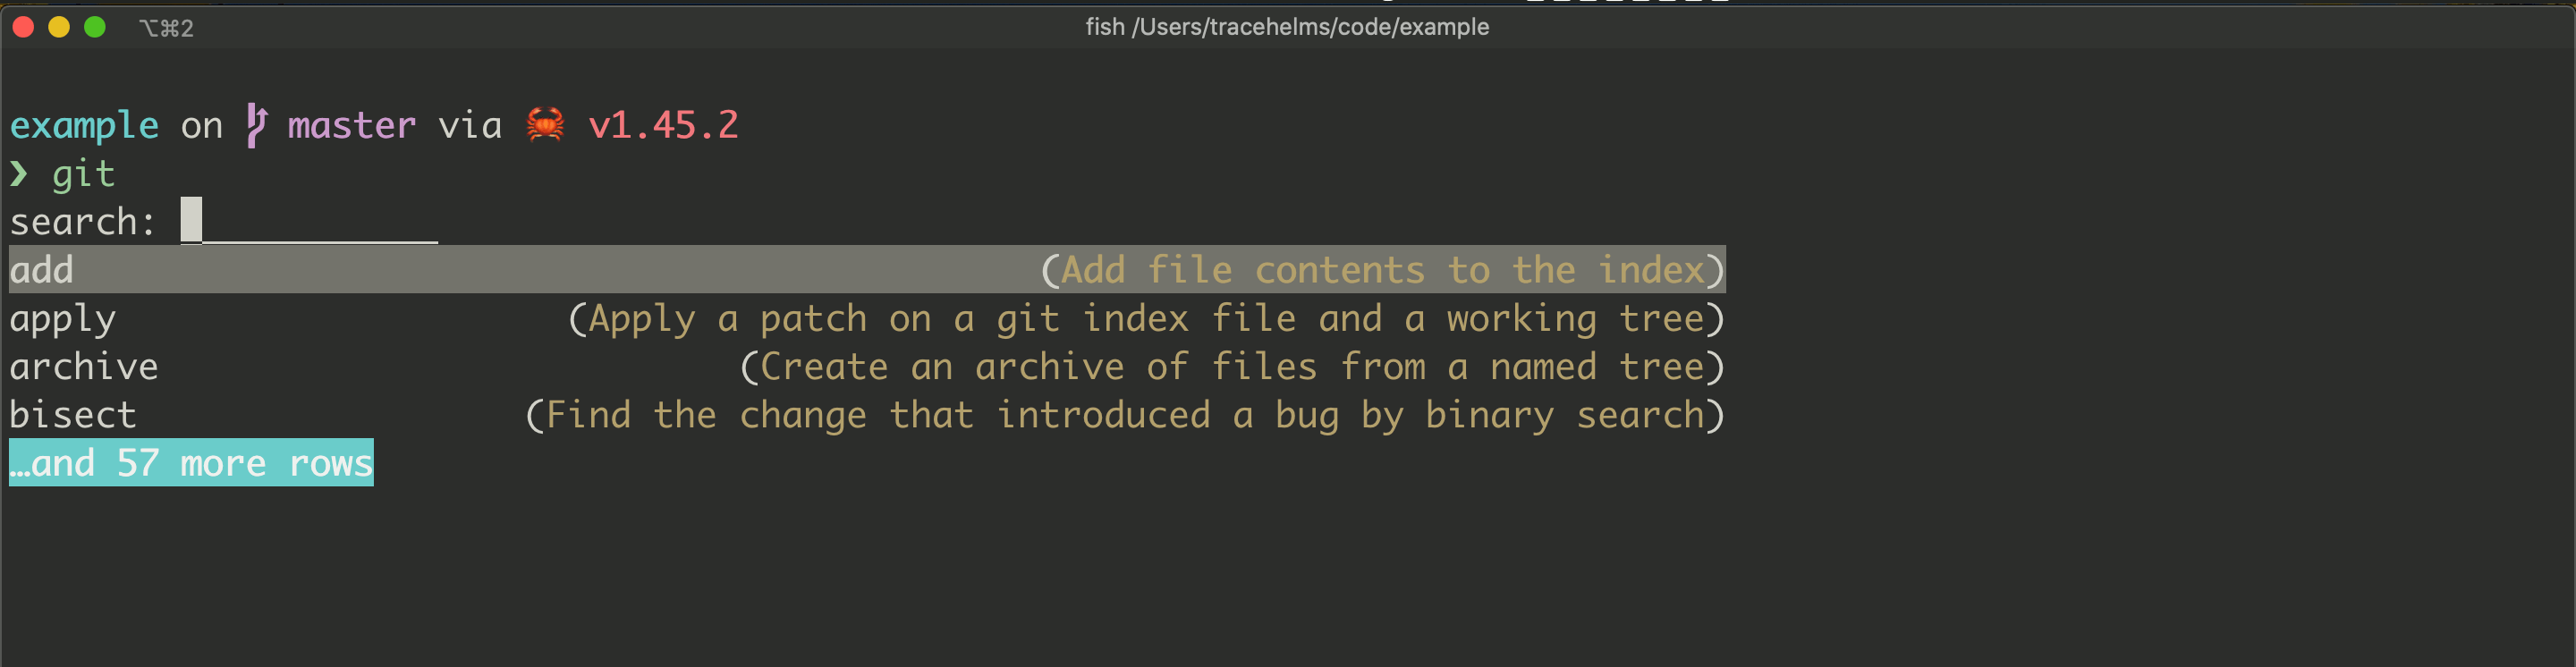
And even for subcommands, like Git and other command line tools:
Wrap Up
I hope the configuration I’ve talked about will be a great starting point for you. I also hope it will inspire you to learn more about your tools and the power of the command line. I really believe that it’s a valuable skill and all software developers should know how to use it.
Lastly, remember that everyone has different preferences, so please keep experimenting and customize your terminal so it works better for you.